Looking for a fun craft project for a snowy day? This resist art painting takes its inspiration from the snowy landscapes of the winter forest.
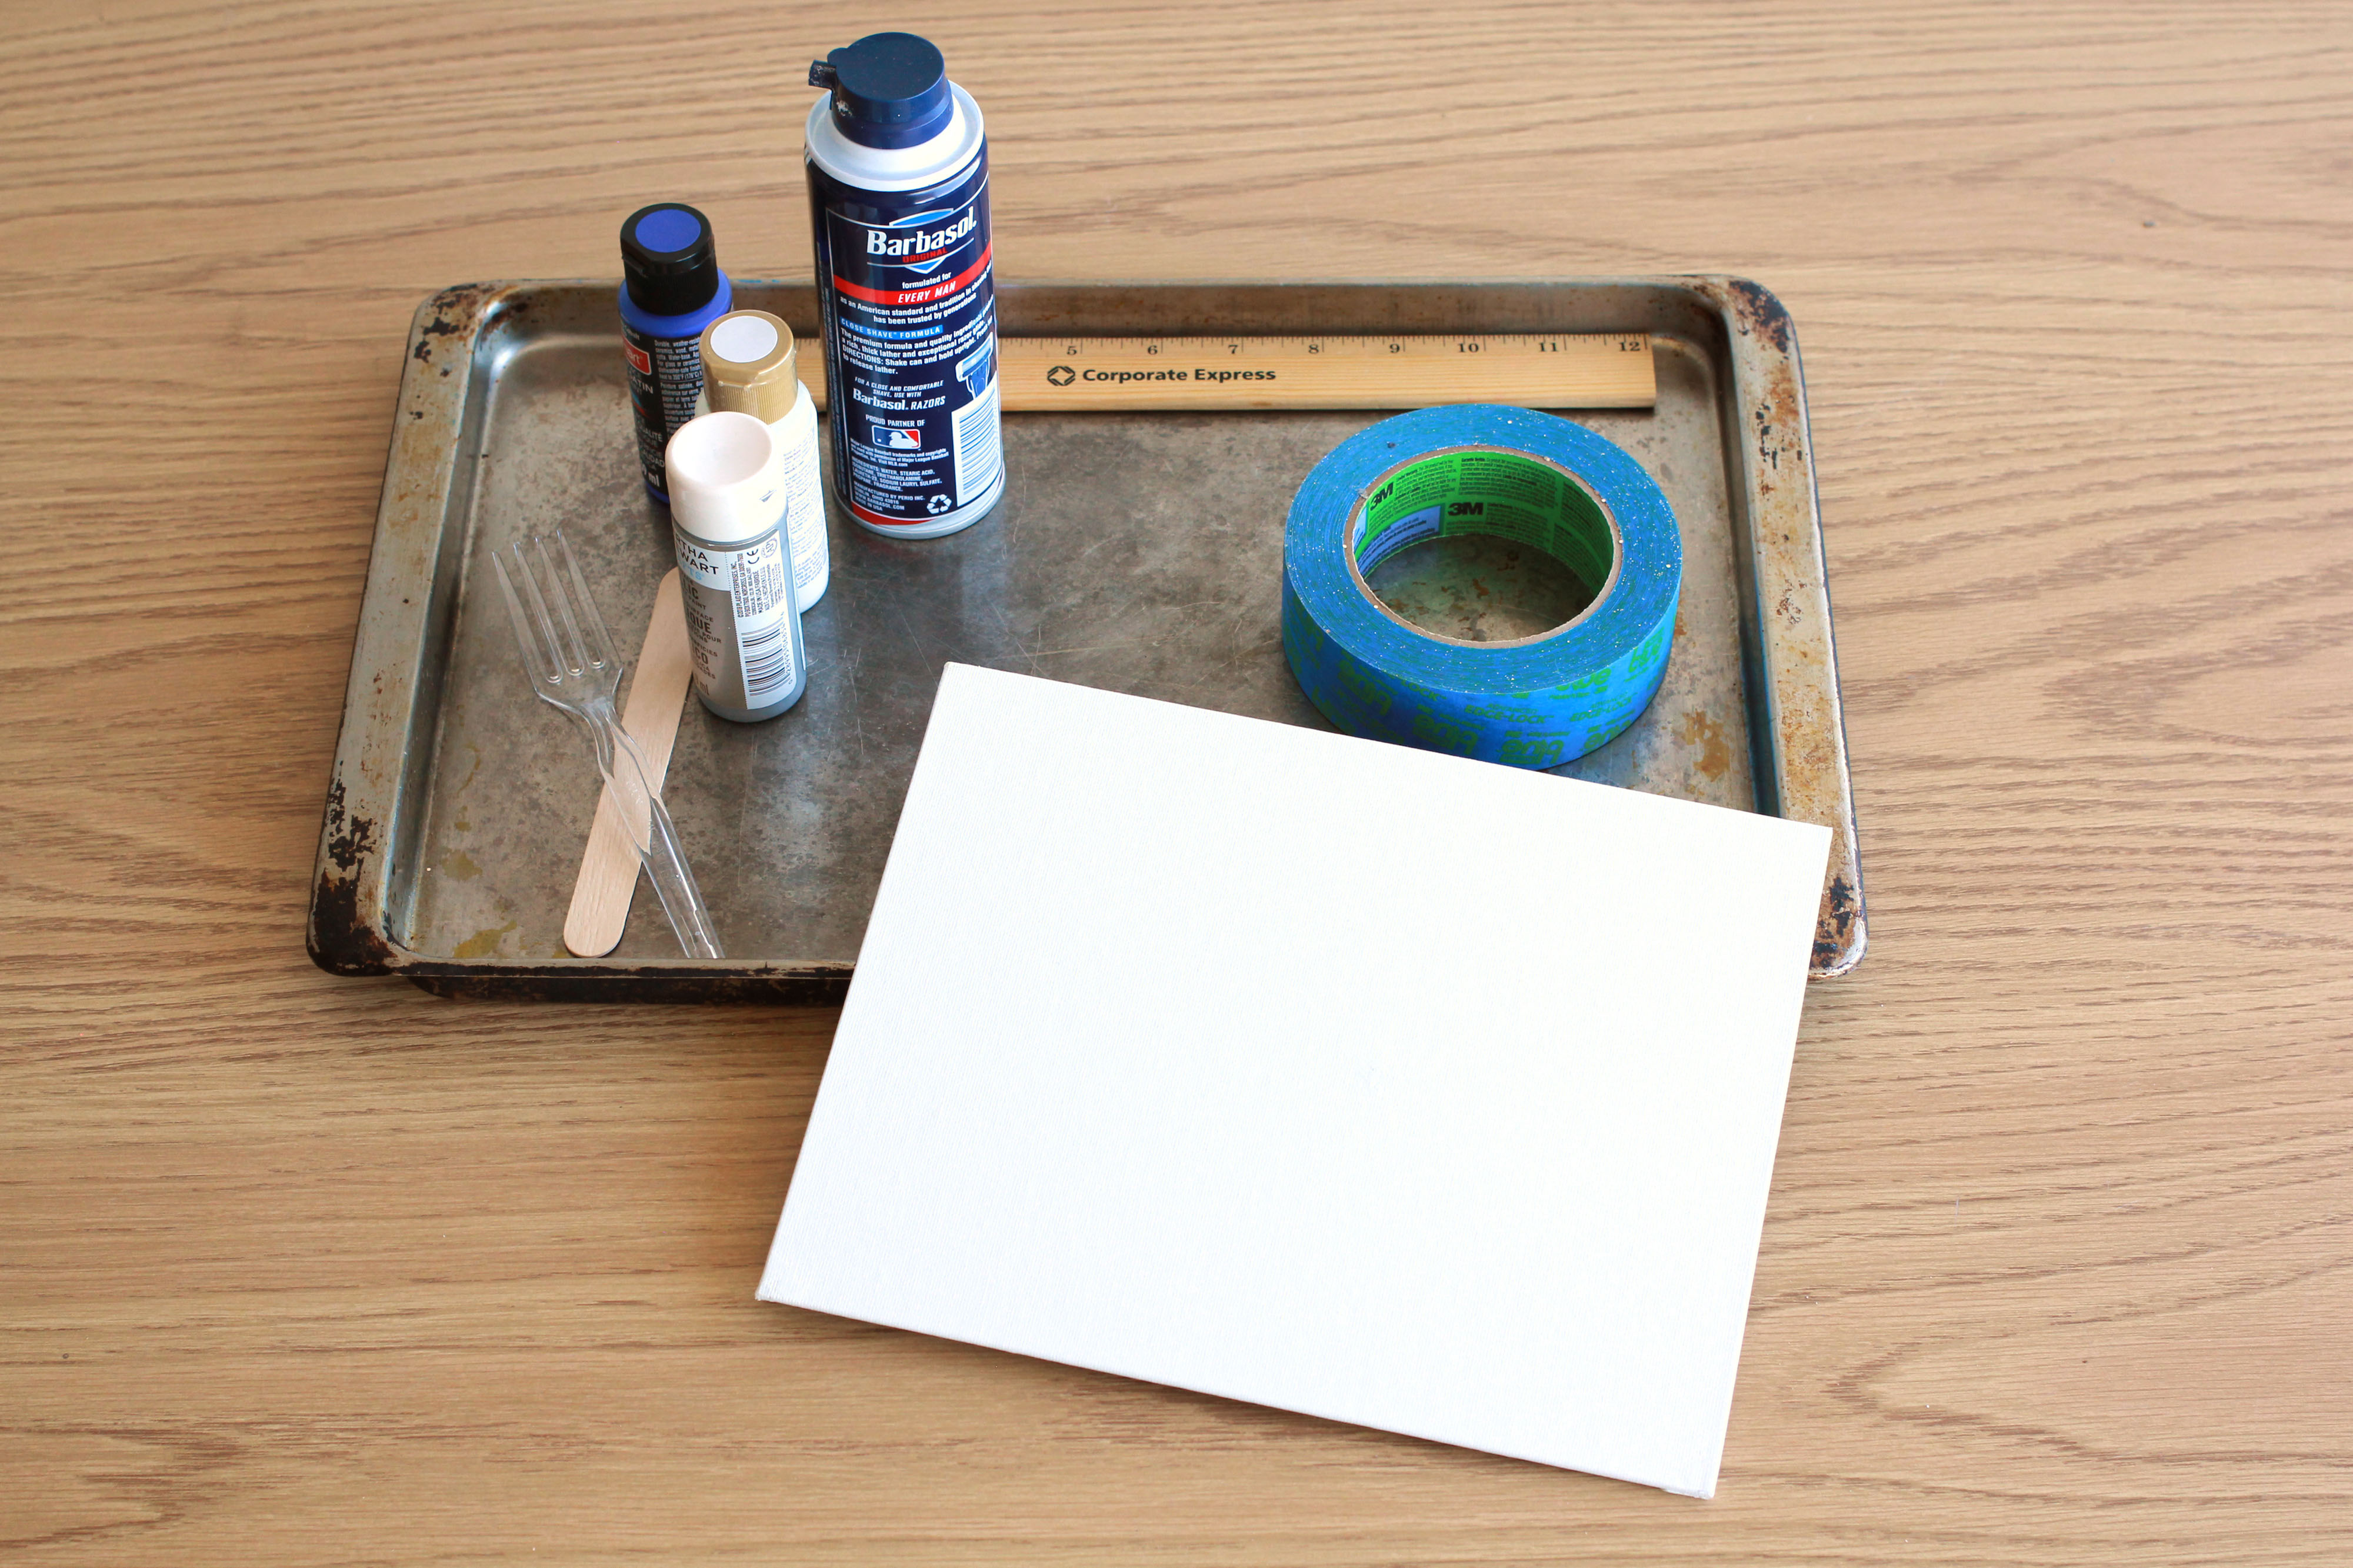
Here are the supplies you’ll need:
- 2” or wider painter’s tape or masking tape
- Small blank white canvas or canvas panels (samples were done on 8”x 10” panels)
- Toothpick or fork
- Blue paint (liquid watercolor, acrylic, or tempera paint)
- Silver paint
- Black magic marker
- Shaving cream (the cheap local dollar store brand is fine)
- Baking sheet (large enough for the canvas)
- Ruler or other straight edge tool
- Optional white glitter, clear glitter, or white paint
Birch Trees on a Snowy Day Tutorial
Step One: Make tree trunks out of painter’s tape
For the 8’x10” canvas we cut masking tape into 8” long strips. If you are using a smaller or larger canvas, cut the masking tape long enough for it to reach from the bottom to the top of the canvas.
Birch trees were traditionally planted in groups of threes (the origins of this tradition are unknown), so place the strips in groups of 3 or more.
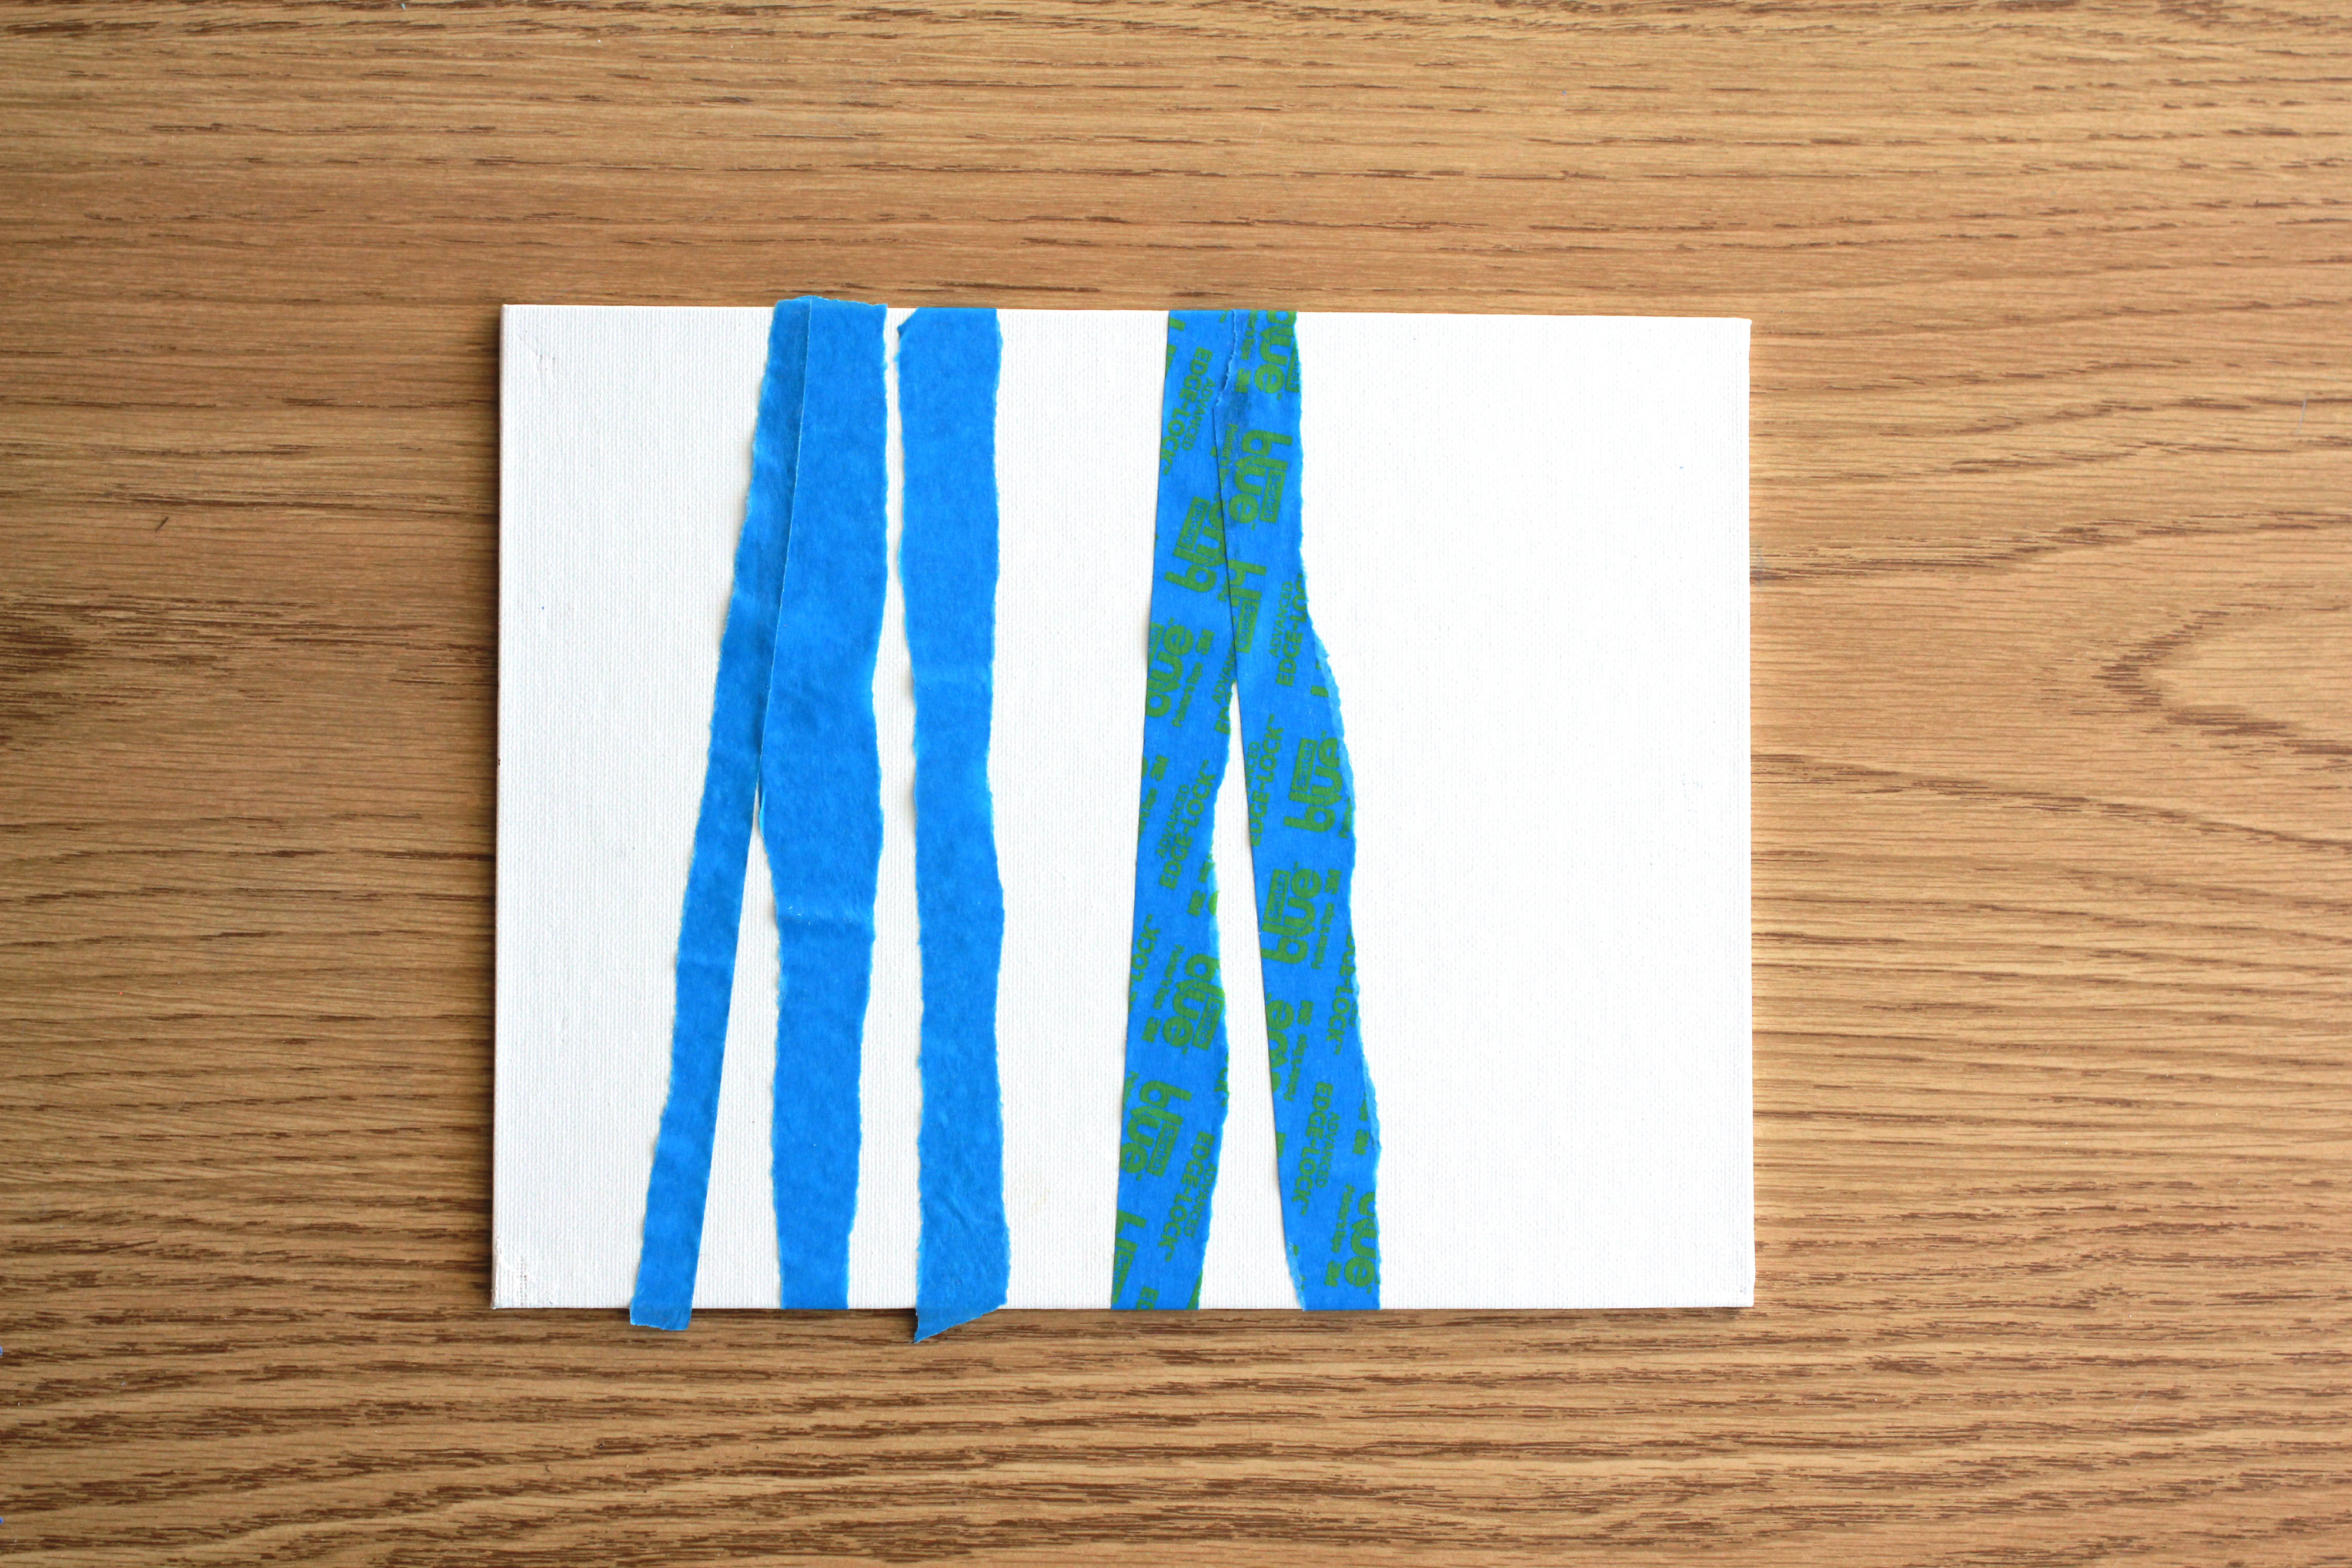
After you have cut your strips, starting at the top, carefully rip the painter’s tape length-wise to create an uneven edges.
Tape the painter’s tape to the canvas as desired. Set aside.
Step Two: Prepare shaving cream and paint
In the baking sheet , spray enough shaving cream to cover the bottom of the pan.
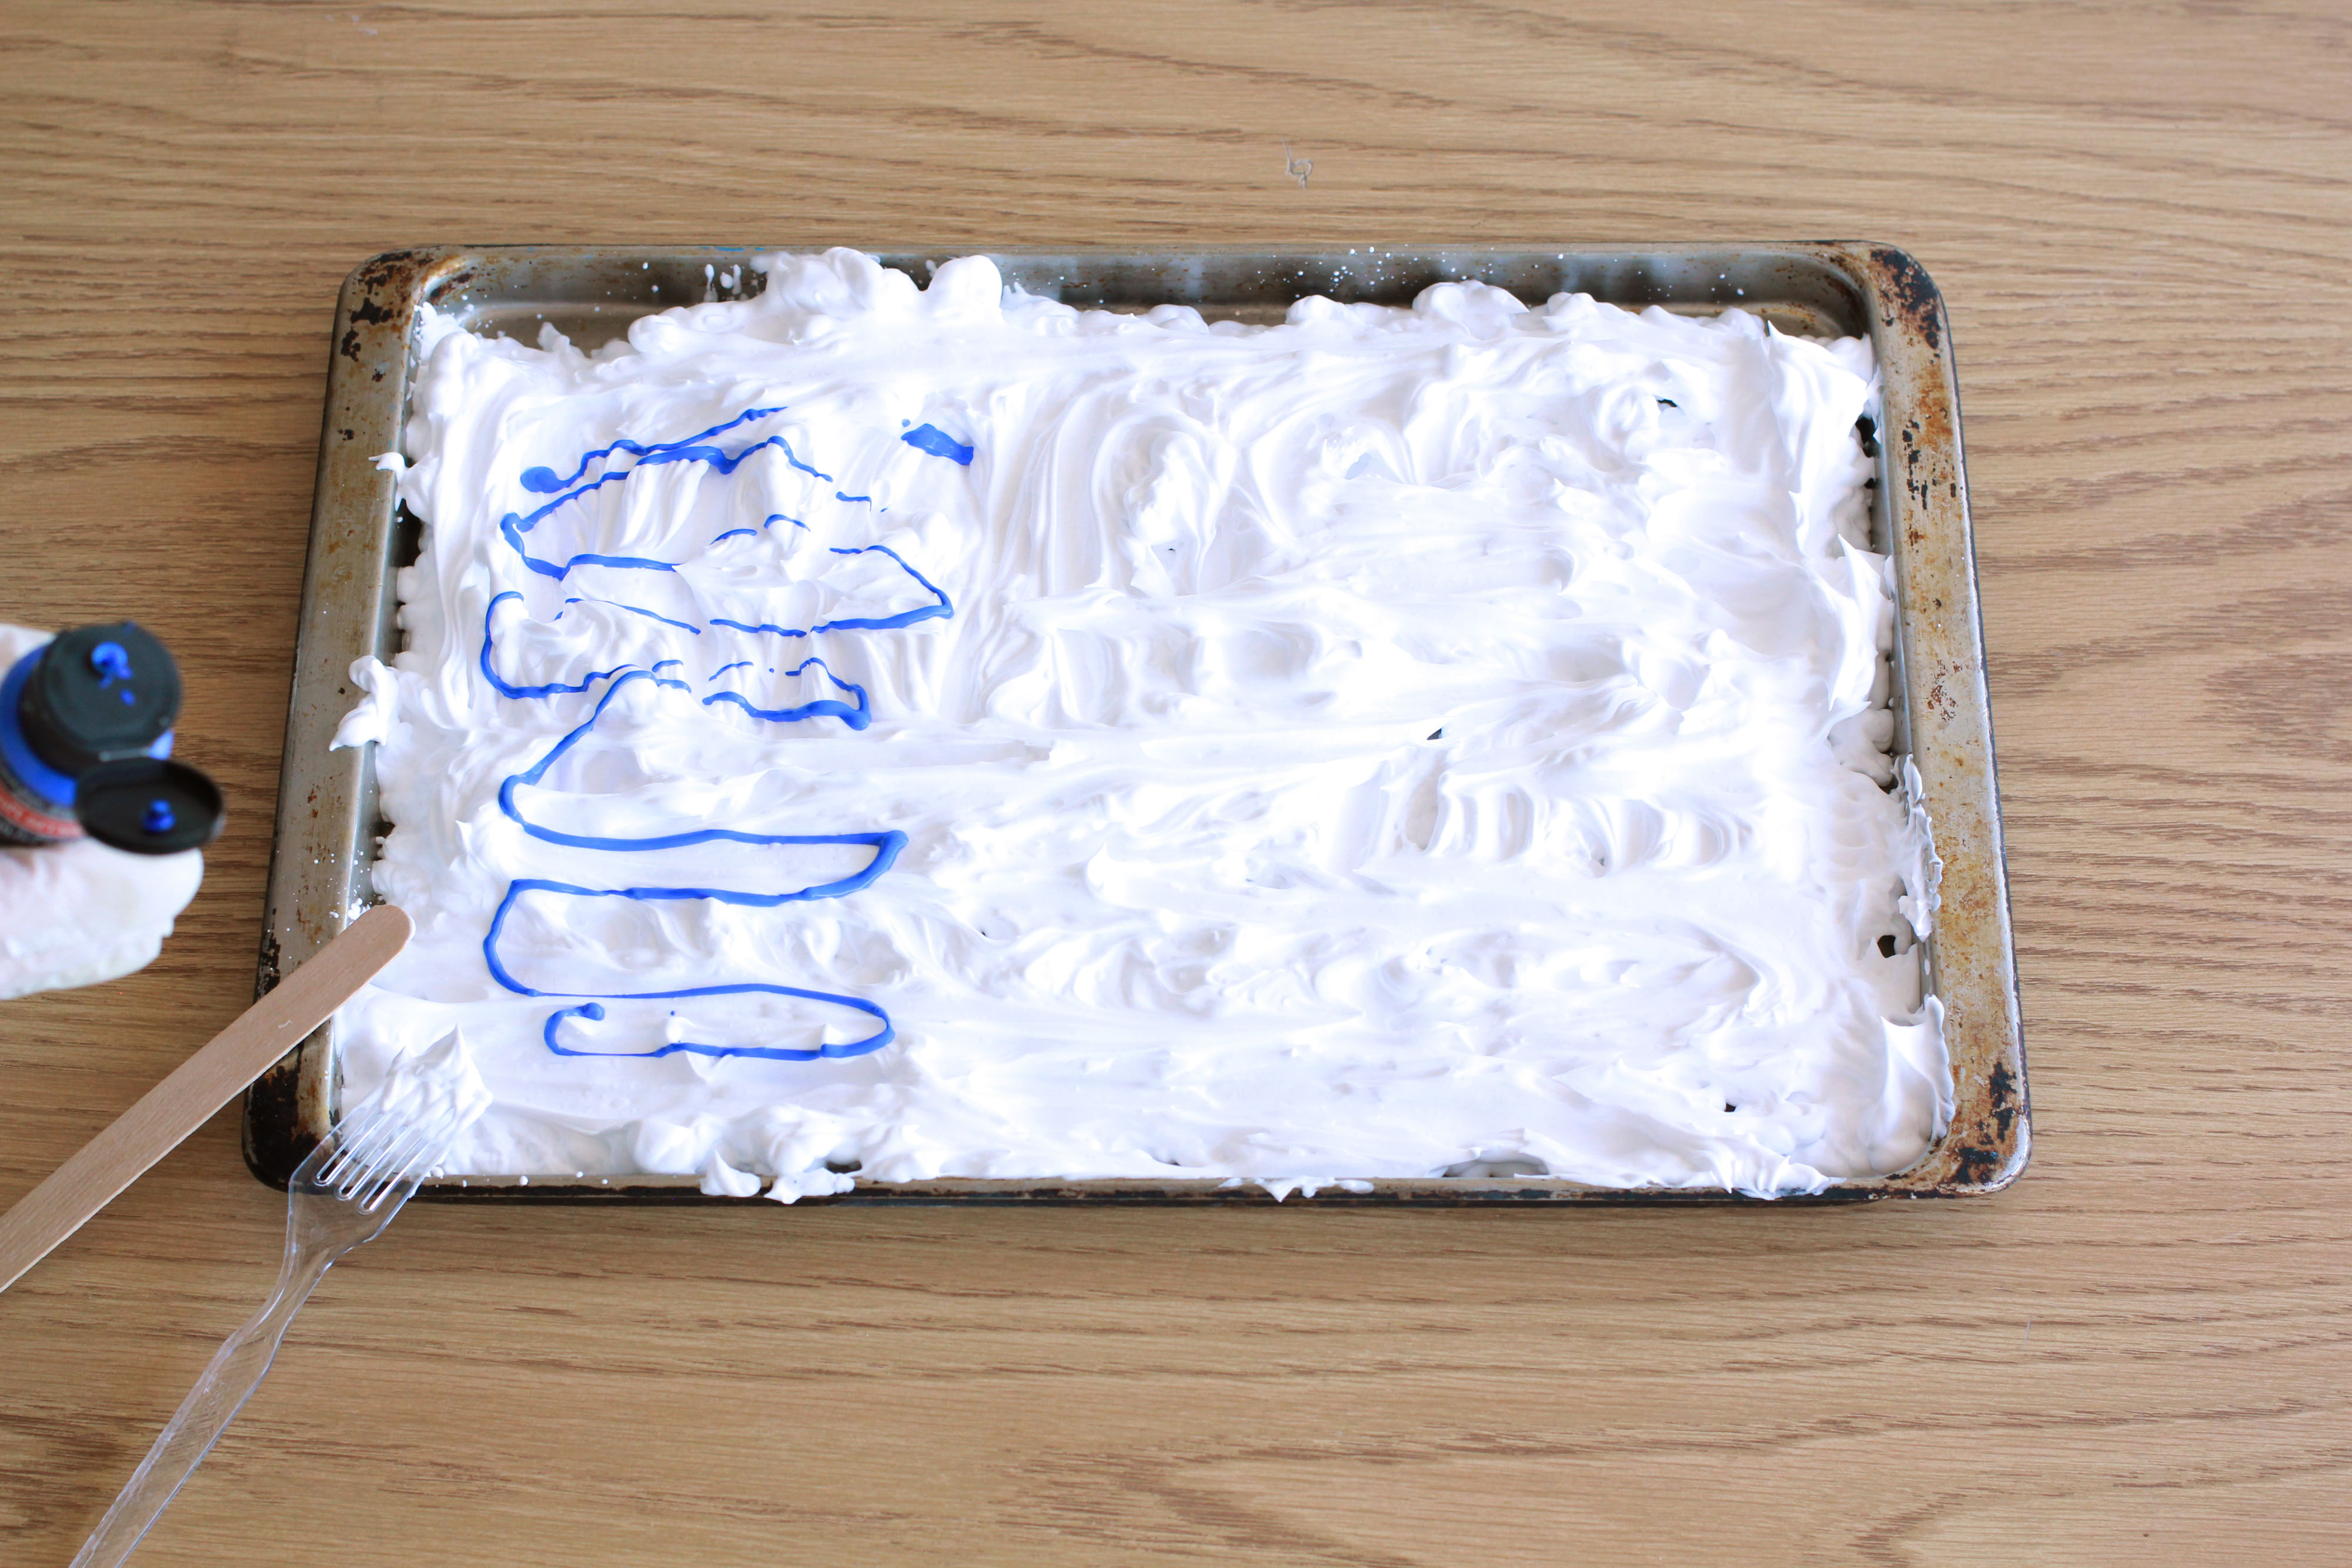
Swirl in a small amount each of the blue and silver paint into the shaving cream, using a toothpick, or fork, careful not to mix completely, creating a marble effect.

Step Three: Add paint to the canvas
Take the canvas, and press it into the shaving cream mixture taped side down.
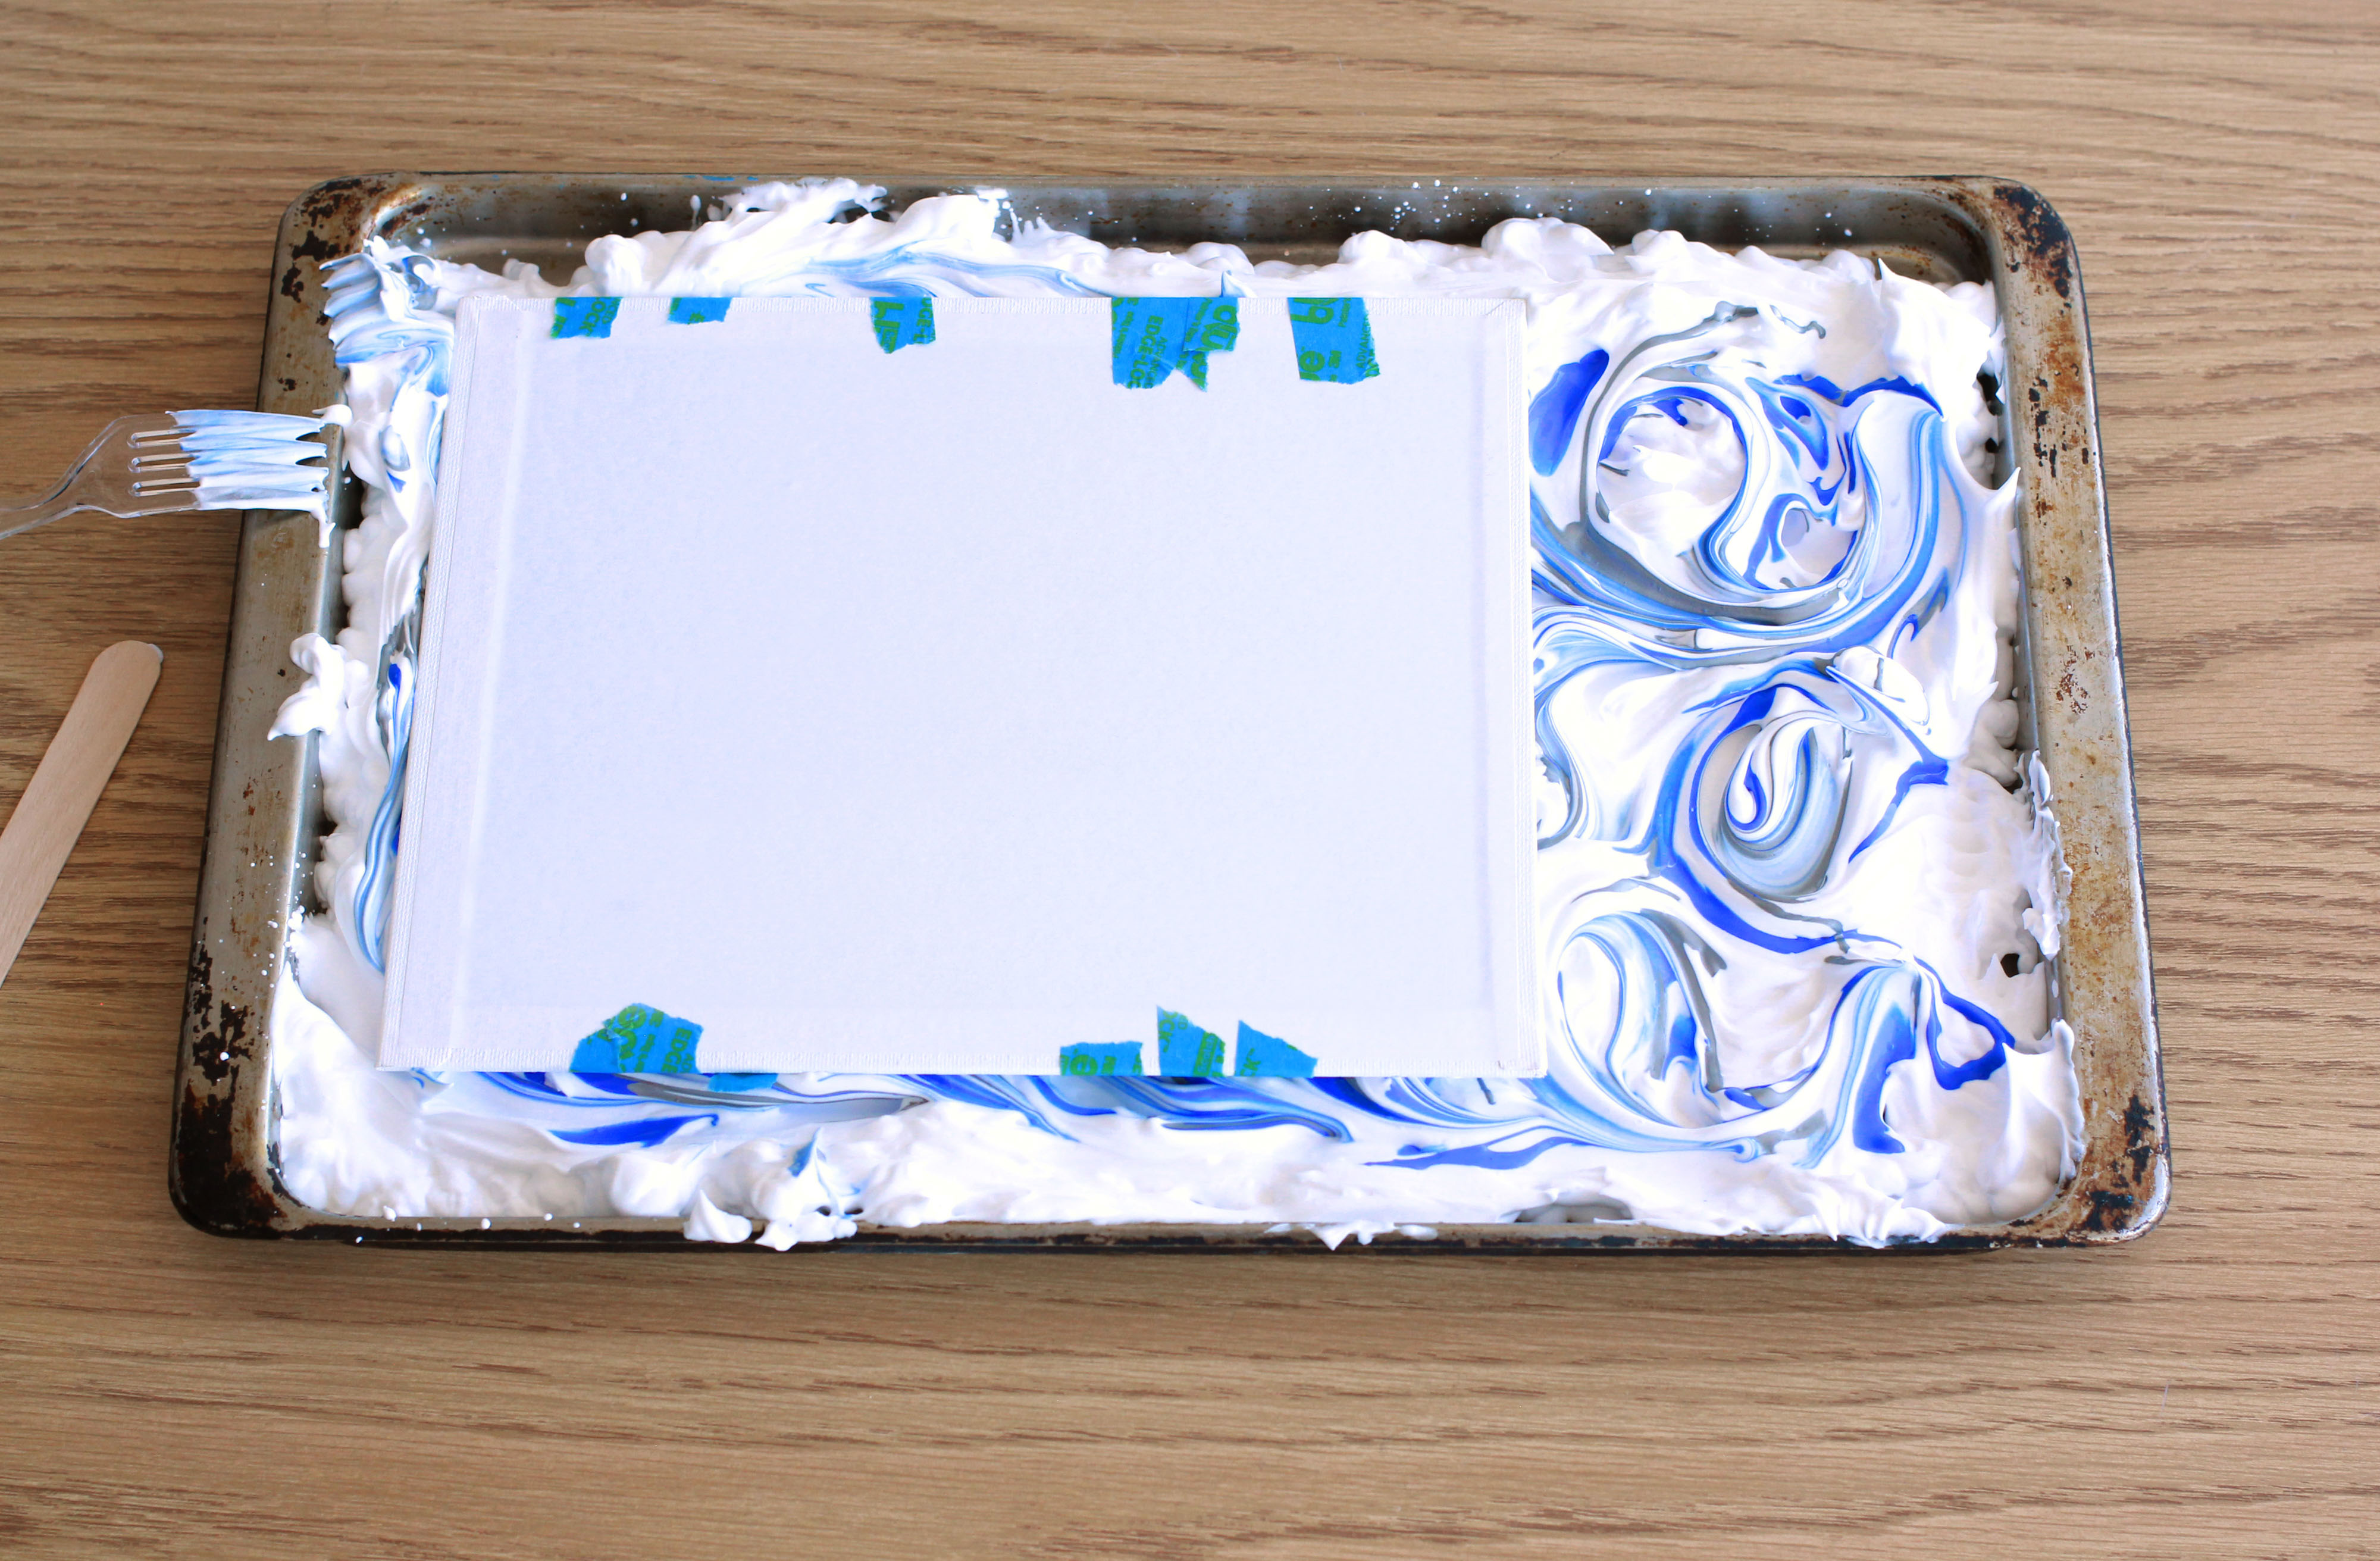
Lift gently, and scrape off excess shaving cream with a ruler or straight edge tool.
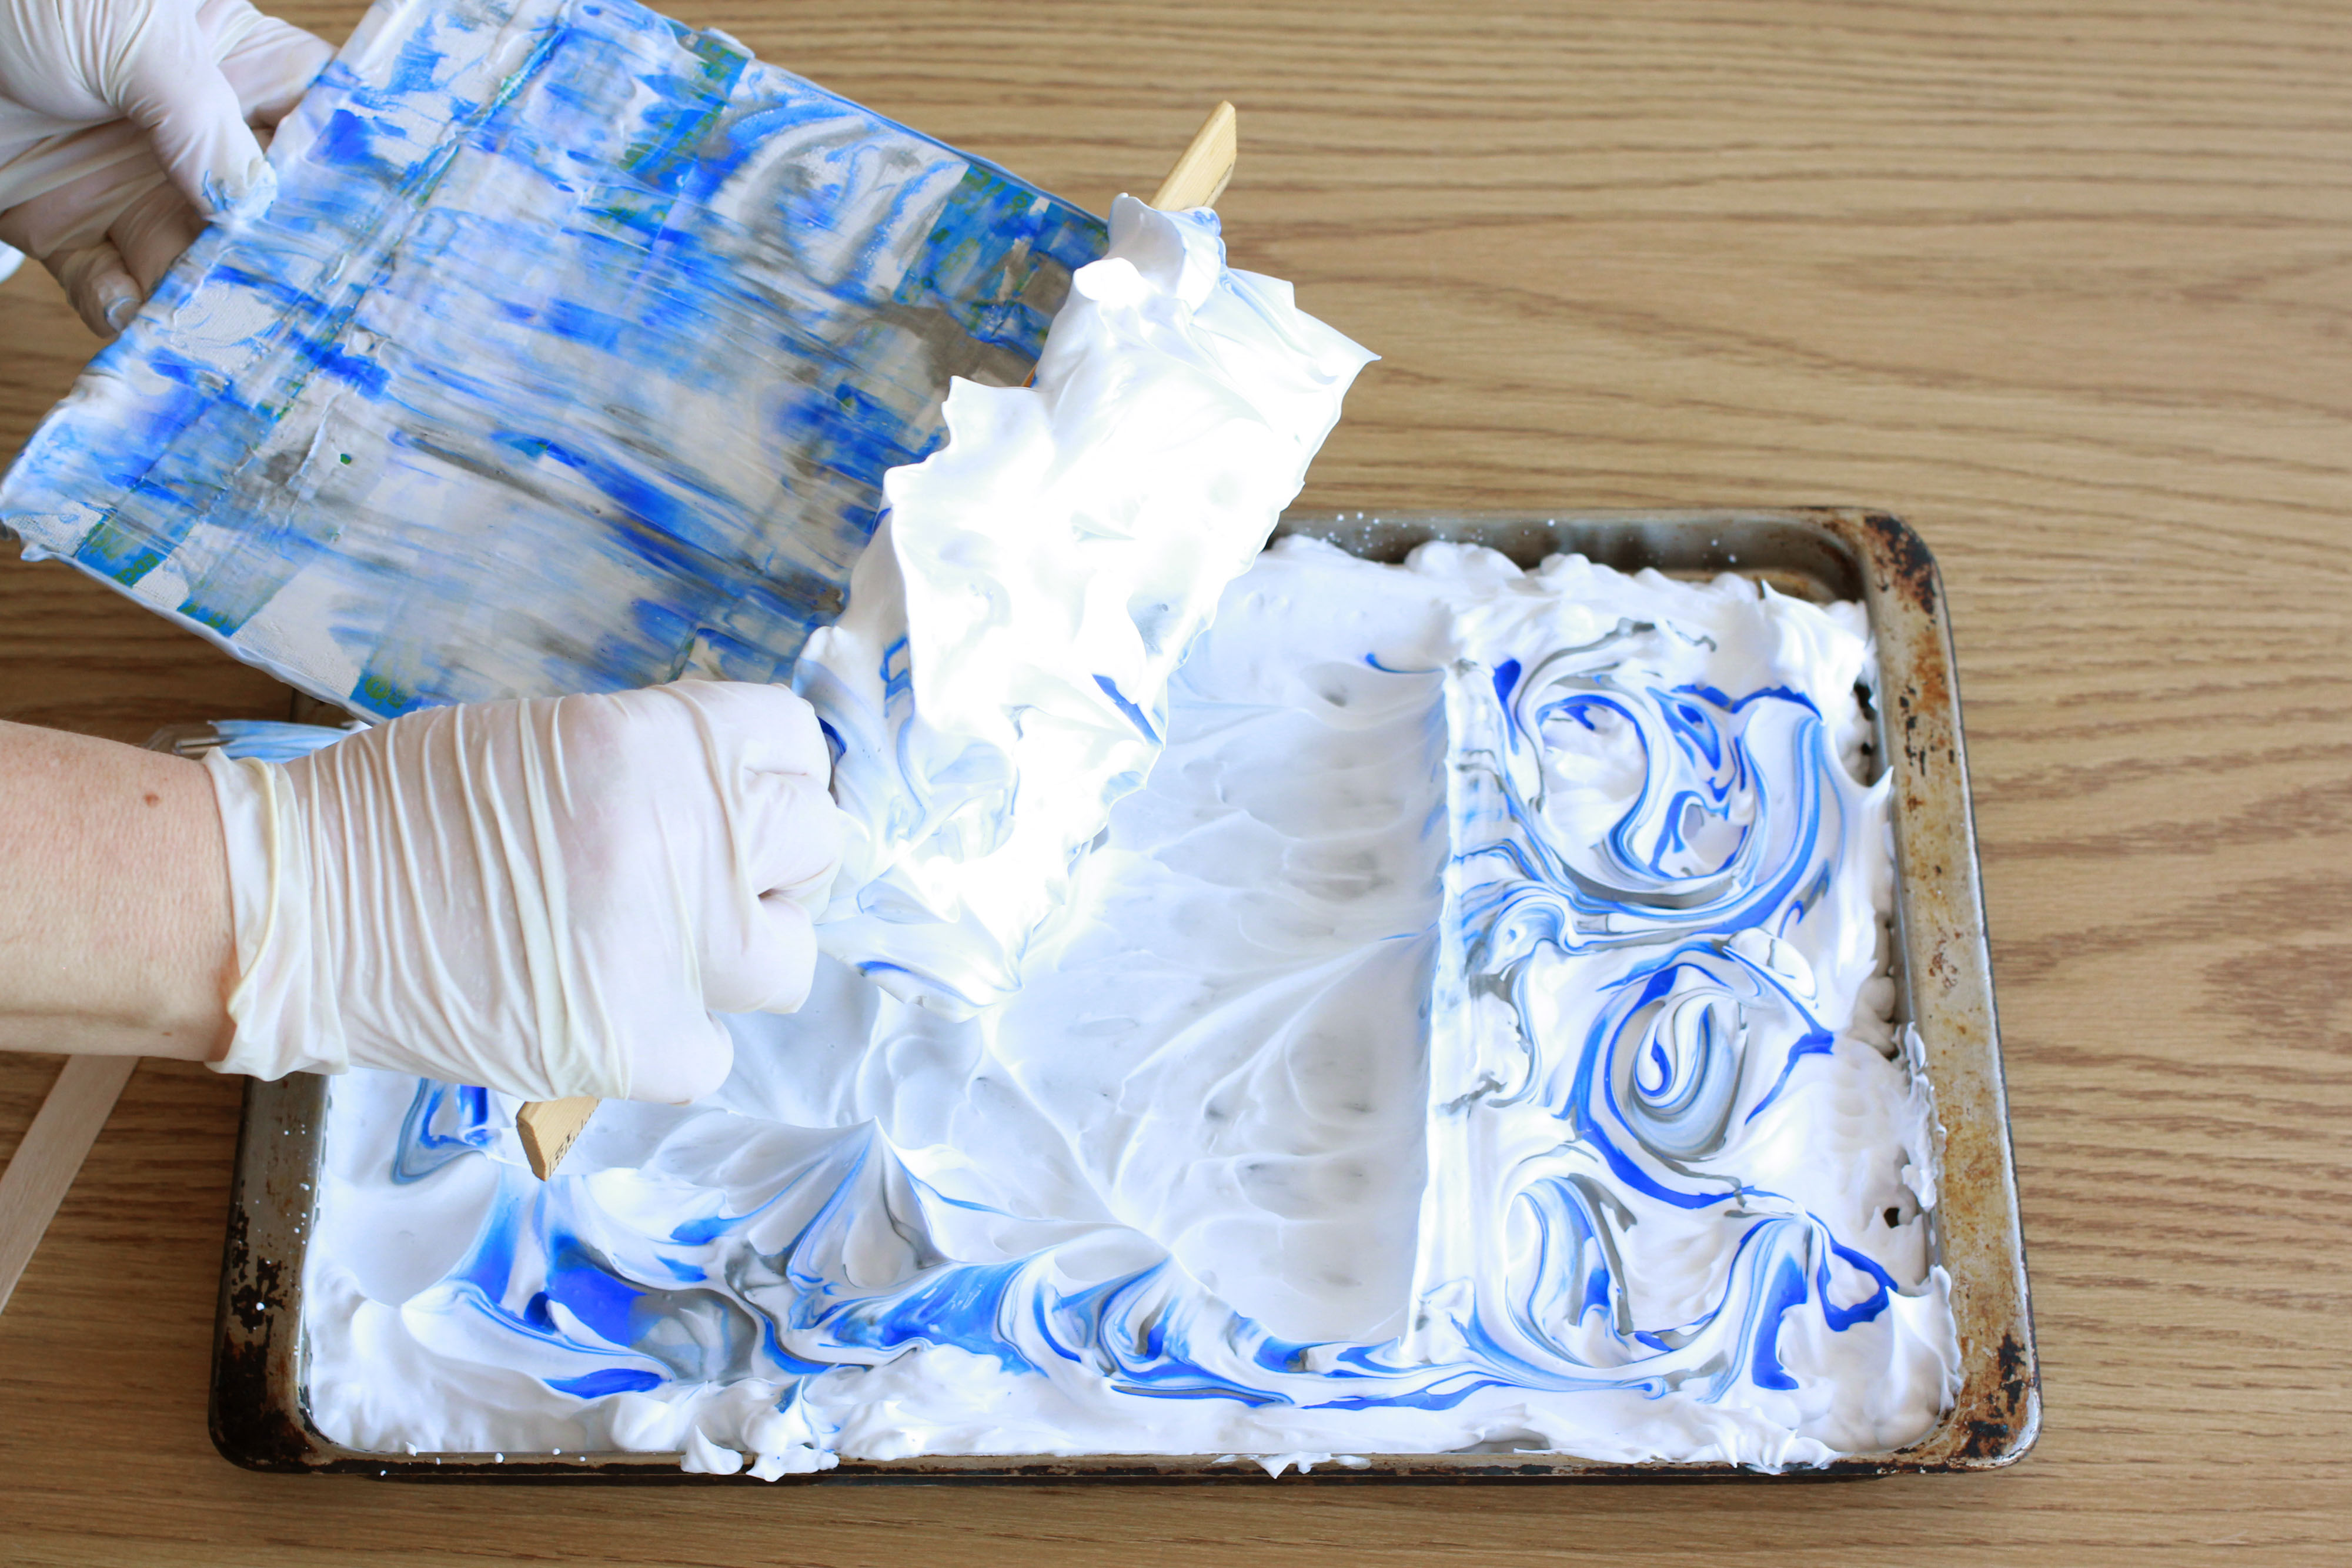
Let dry.
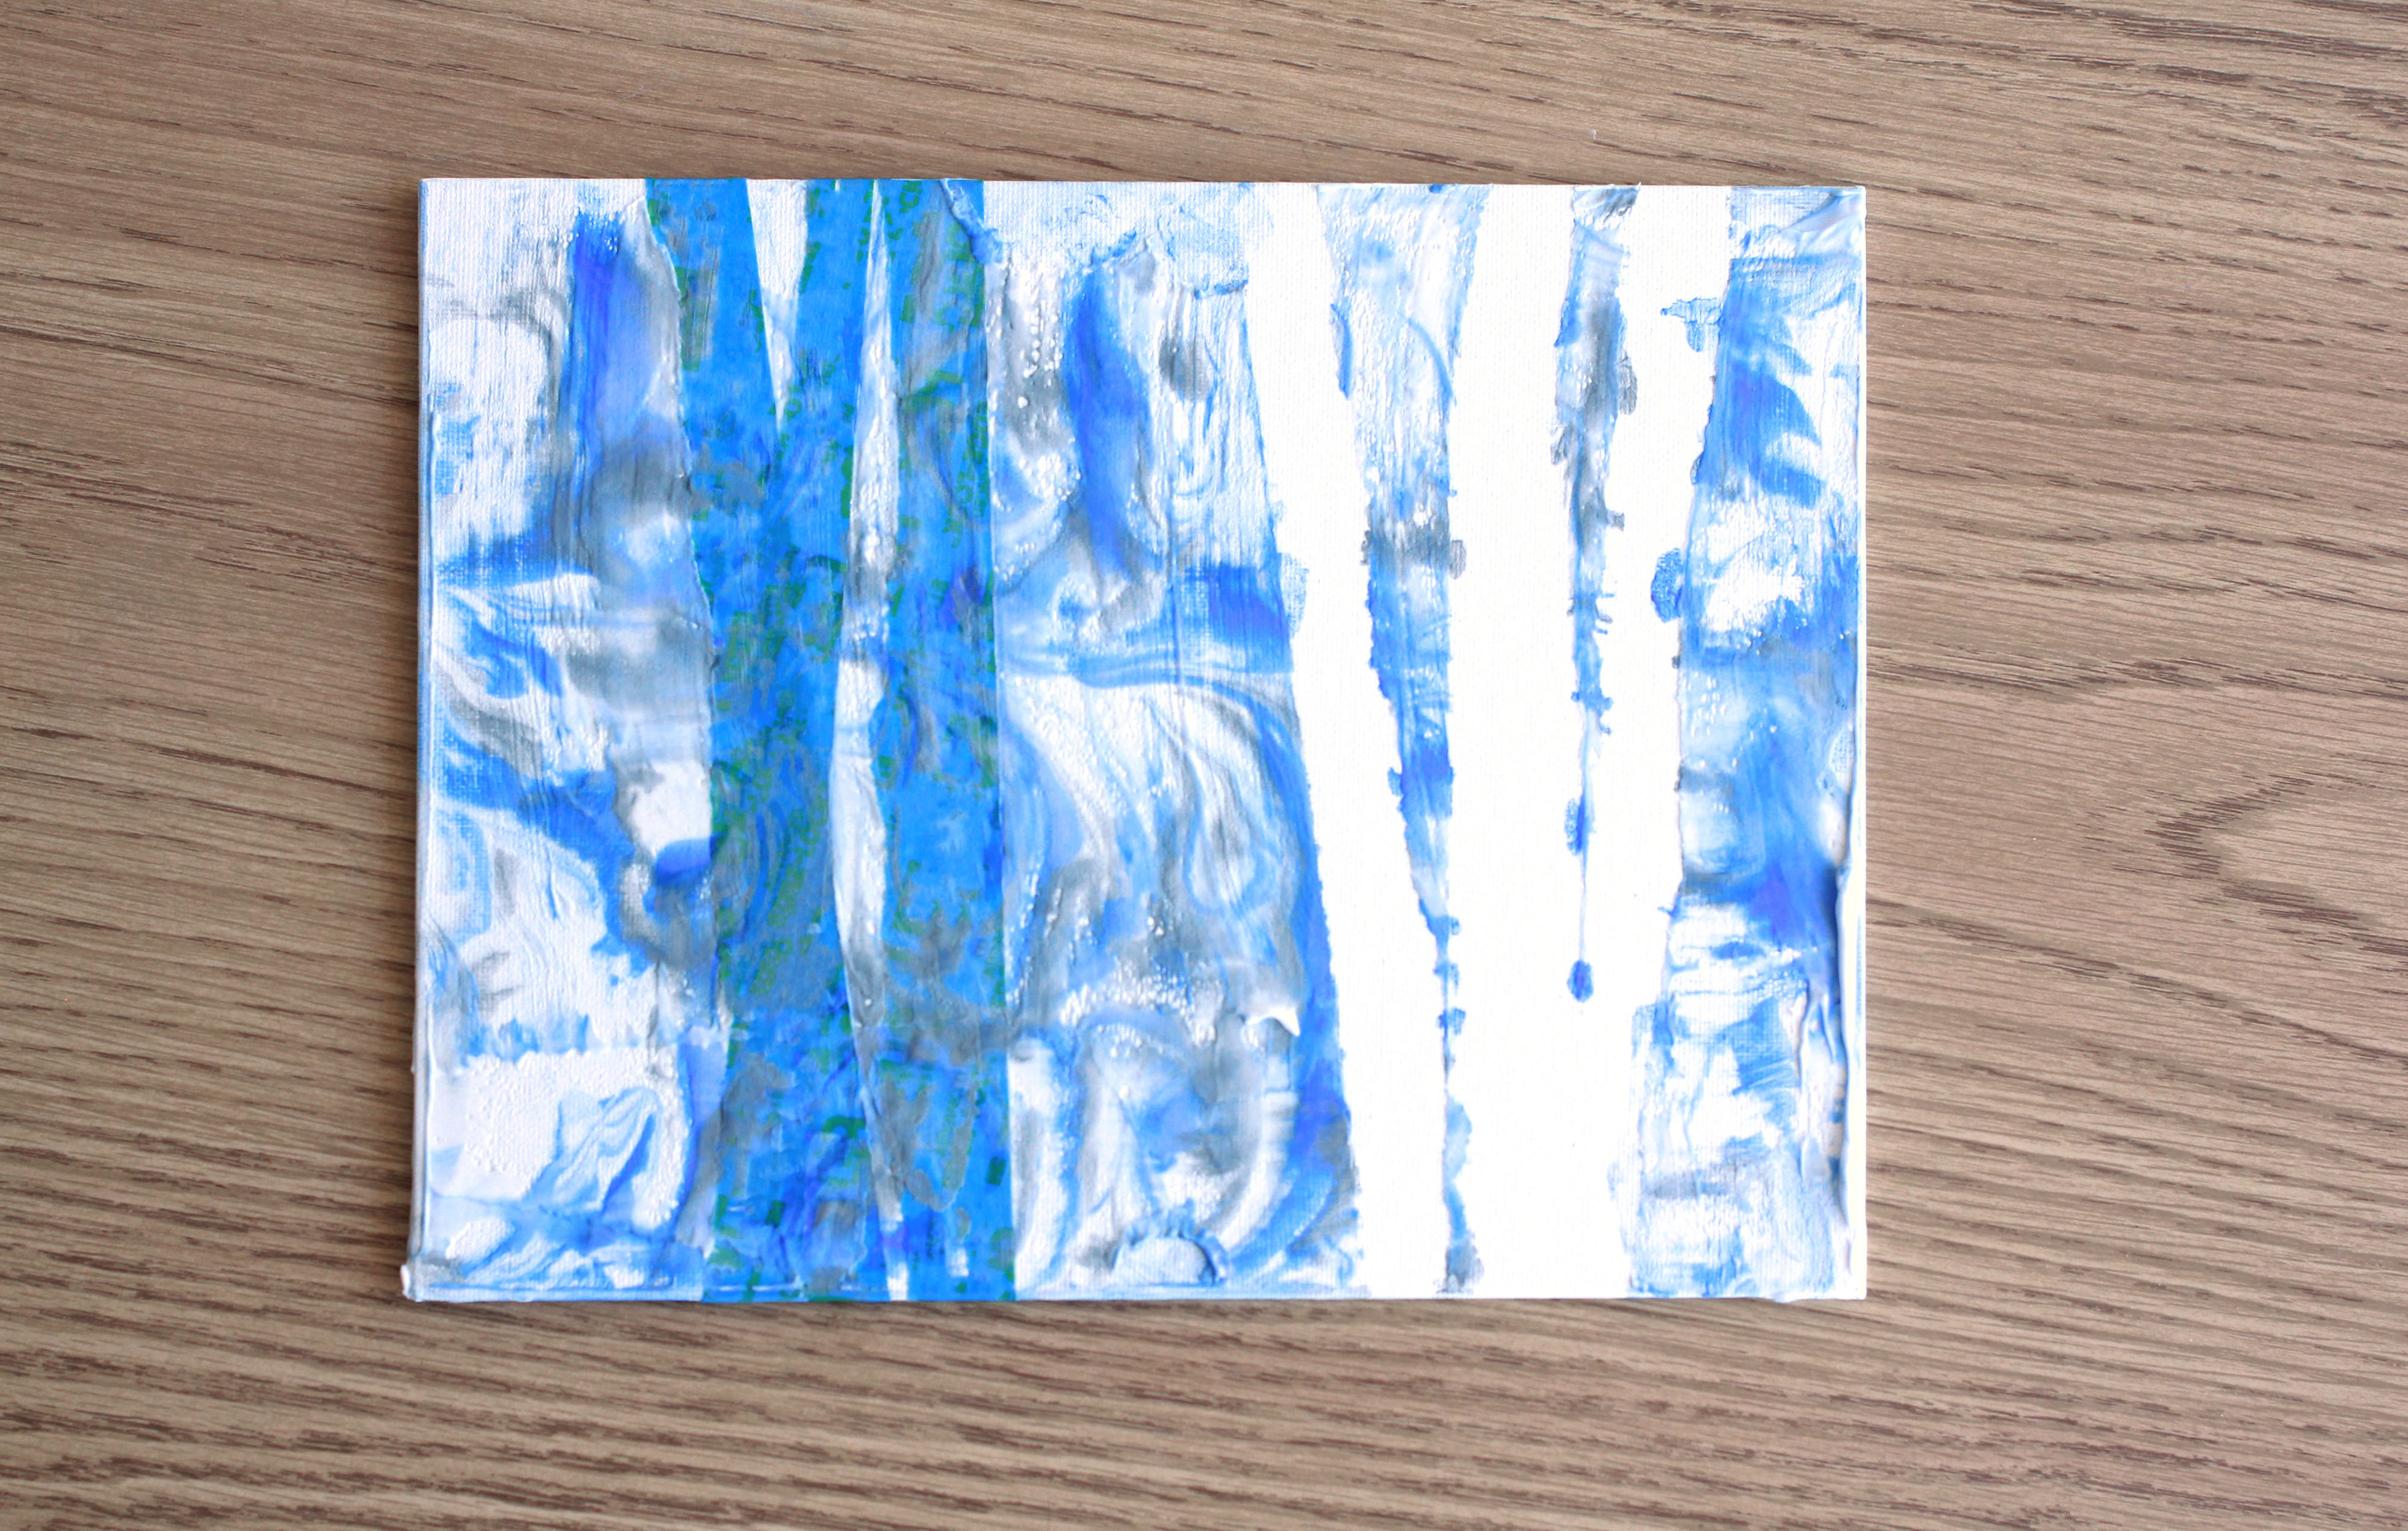
Step Four: Remove tape to reveal the birch tree shapes
Gently remove the painter’s tape to reveal the white canvas underneath.
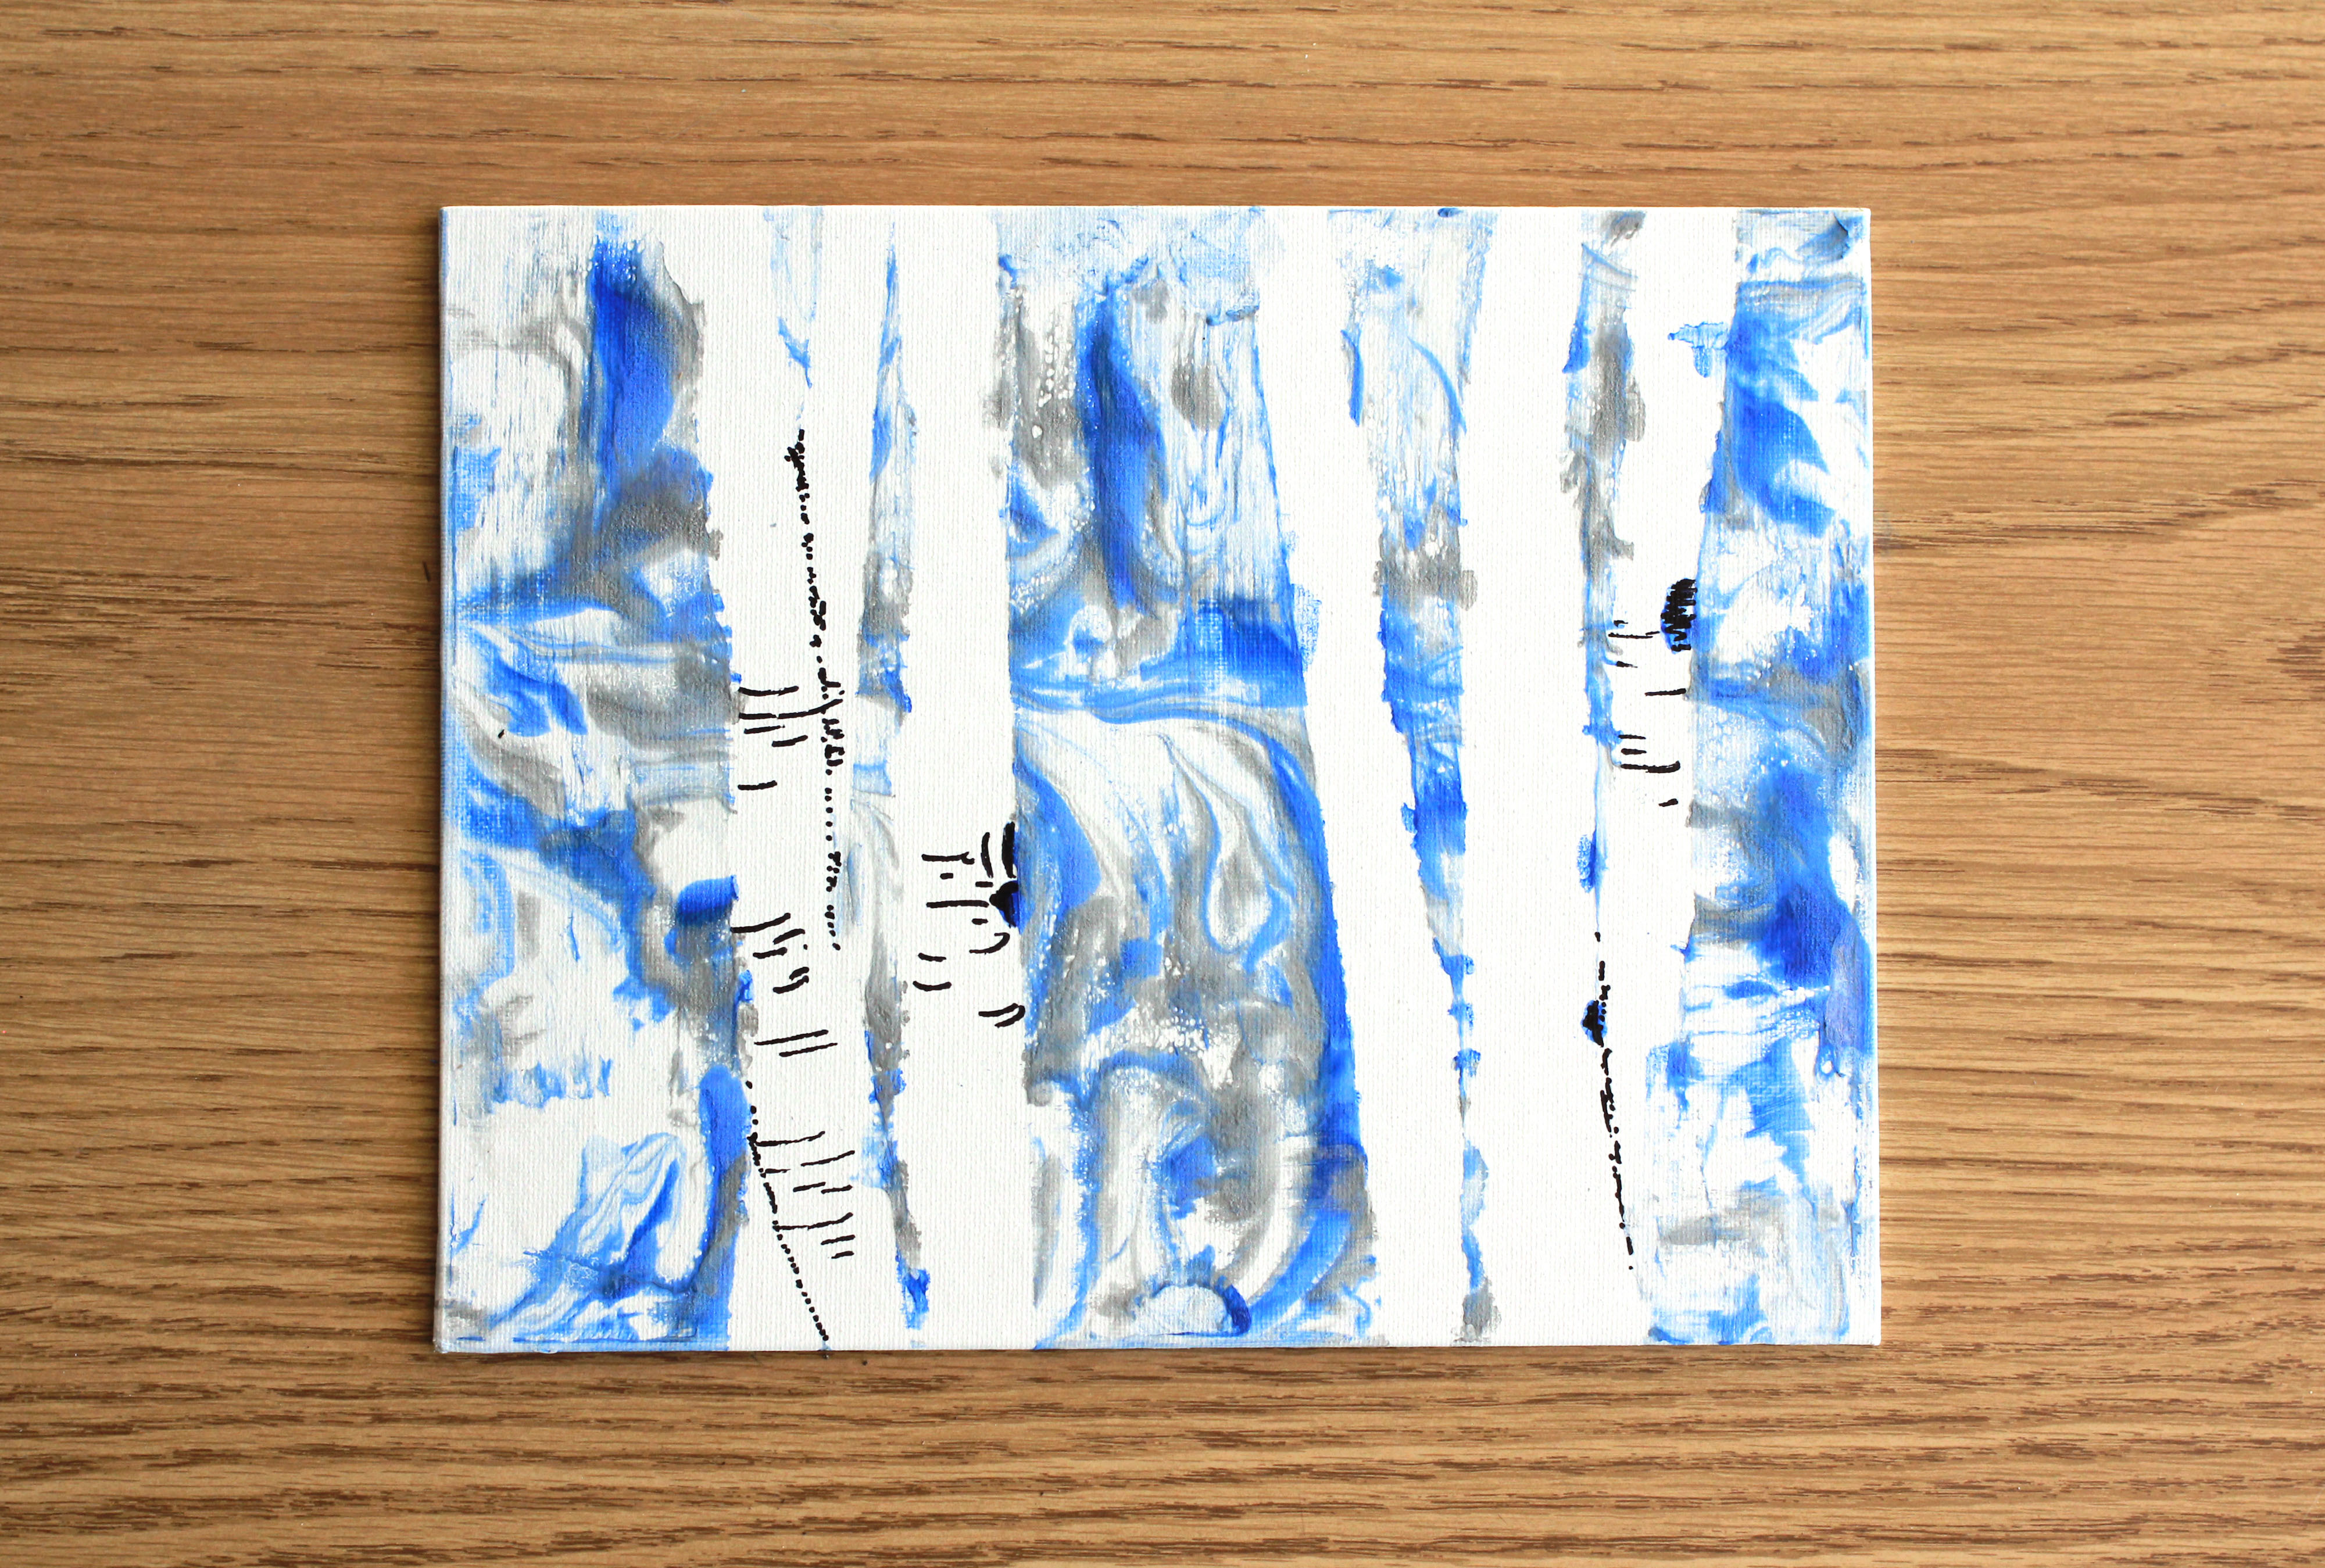
Step Five: Draw in details
Using a black magic marker draw in bark accents to the trees.
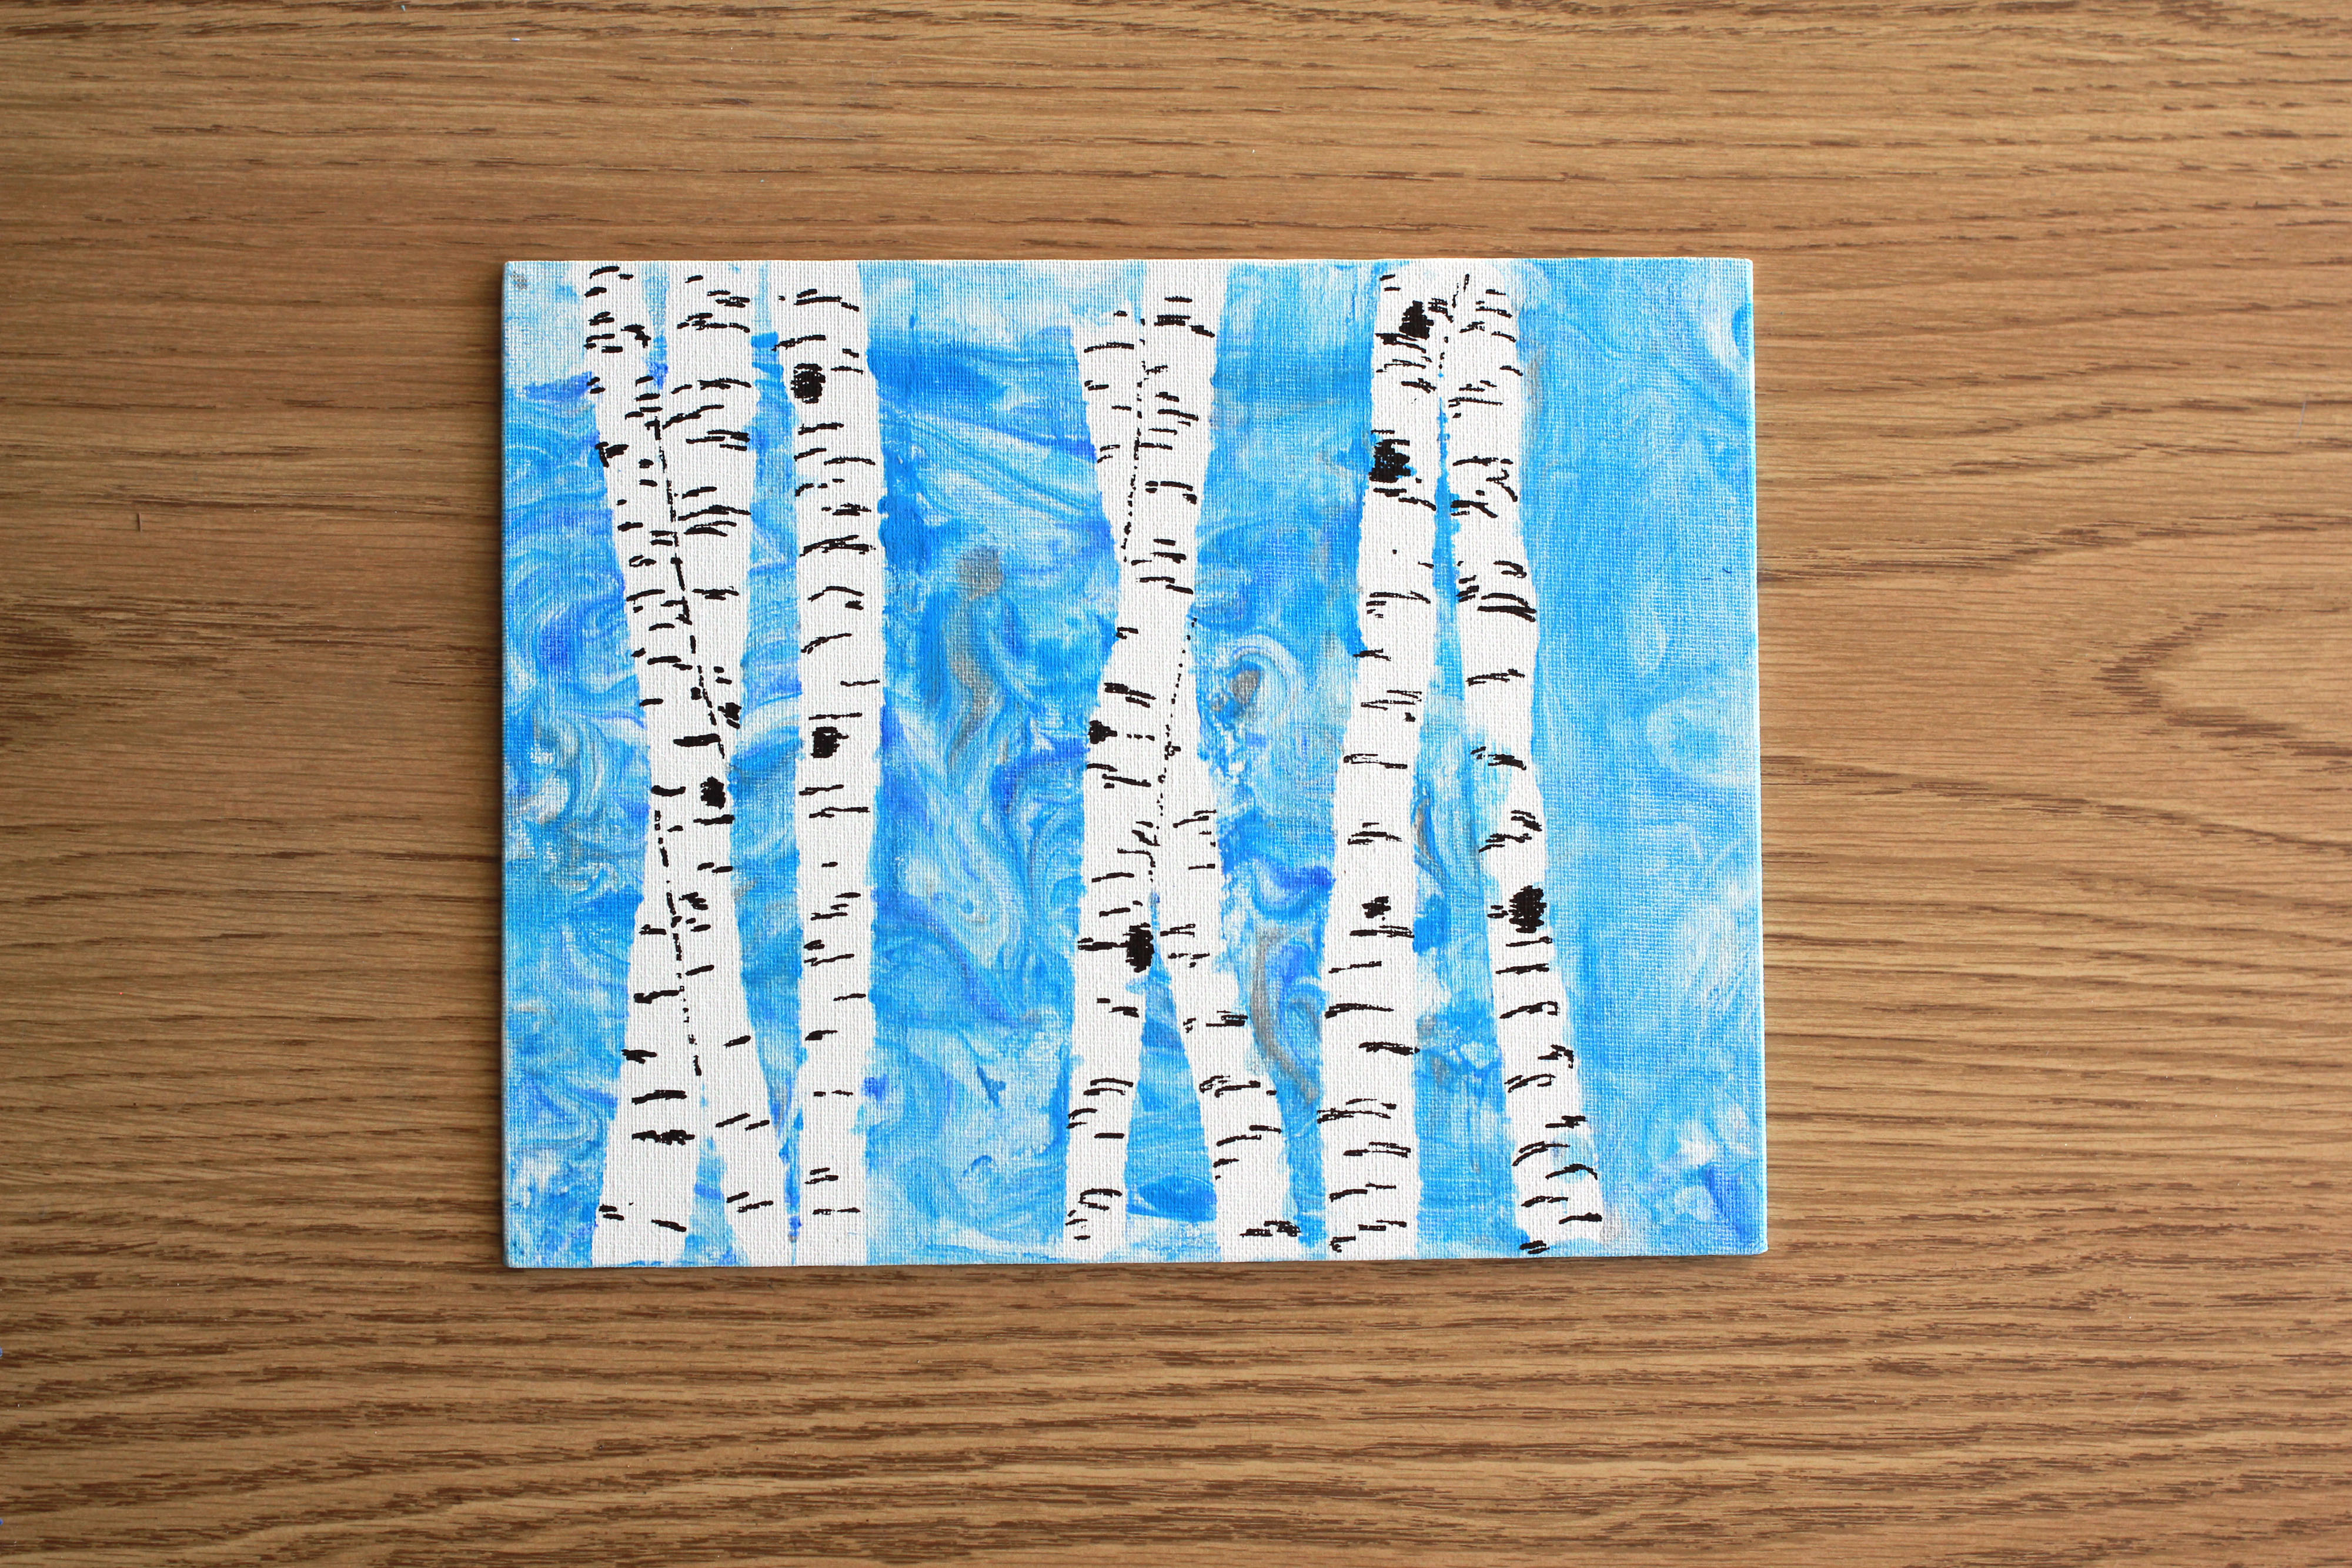
Step Six: Add the finishing touches
If desired create snowflakes with the white paint applied with a toothpick or cotton swab.
Or if you want some sparkle- paint on some glue and lightly sprinkle on the glitter.
Allow to dry completely.
Enjoy this post? Read on, and sign up for our homeschool newsletter.